How to Rappel: What Climbers Need to Know Before Going Down a Rope
Published How we research
Rappelling looks like the easy part of a climbing day, but it is where many serious accidents happen. A rappel means sliding down a fixed rope with a friction device, and a single missed check, such as an unknotted rope end or an unlocked carabiner, can end badly. This overview explains the gear involved, how a typical setup works and the habits that experienced climbers follow. It is general information and no substitute for in person instruction from a qualified guide or instructor.
Products from this article
The highest-scoring picks from the buying guides this article links to. Scores are our editorial assessment, not customer ratings.
As an Amazon Associate we earn from qualifying purchases. This does not change our picks. Affiliate disclosure
New to Prime? Try Prime free for fast, free shipping on eligible items.
+ Doubles as a belay and rappel device, saving weight on long routes
From our guide: Best Rappel Devices
+ Two adjustable arms let you clip two points while moving between anchors
From our guide: Best Personal Anchor Systems
+ Assisted braking adds a margin of safety when catching falls
From our guide: Best Climbing Safety Gear
+ Anti-burn grip keeps hands away from hot metal on long rappels
From our guide: Best Rappel Devices
What rappelling is and when it is used
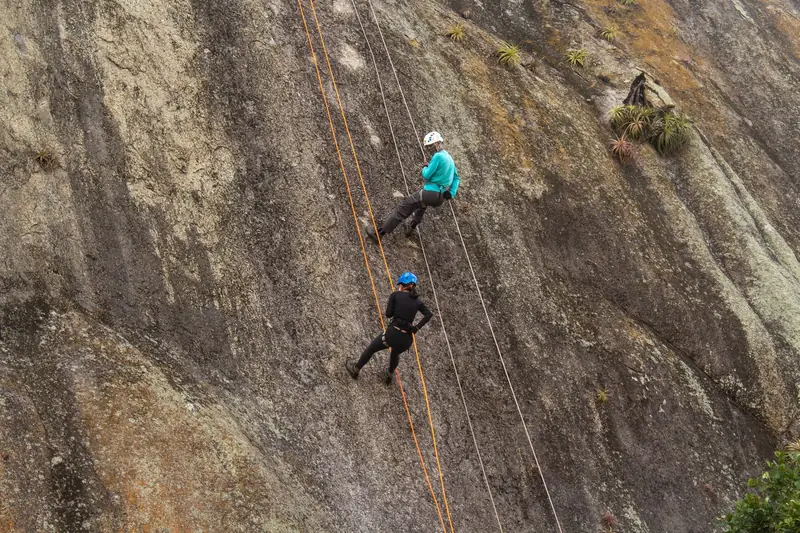
A rappel lowers you down a rope by running it through a device that adds friction, so you control your speed with your brake hand. Climbers use it to descend after a multi pitch route, to get off a sport climb that has no walk off, and to reach a spot below an anchor.
It is a different skill from lowering, where a belayer controls the rope for you. When you rappel, you are responsible for yourself, which makes setup checks especially important.
Rappels come in several forms, including single strand descents on a fixed line, double strand descents on a rope threaded through an anchor, and lowering practices that look similar. Each has its own risks and its own rules, so learn them one at a time rather than mixing them.
Gear that goes into a rappel
A typical setup includes a harness, a rappel device such as a tube style belay device, a locking carabiner, a rope long enough for the descent and a personal anchor system for the moment you clip into the anchor. Many climbers also carry a backup, such as an autoblock knot, that stops them if they lose control.
Gloves help protect your hands from rope friction, and a helmet guards against falling rocks and bumps. Choose gear rated for climbing and read each manual, since devices differ in the rope sizes they handle.
Rope length deserves attention. The rope has to reach the next anchor or the ground, and ropes that look long enough can still come up short in the dark. Many climbers tie stopper knots in both ends and double check the length before starting.
The setup in general terms
In most climbing rappels, the rope is threaded through an anchor, the two ends are brought together, and the climber attaches a device to both strands. Before leaving the anchor, they weigh the system gently to confirm it holds while still connected to the anchor with a personal tether.
Because details differ by anchor type, rope and terrain, the exact method should come from a qualified instructor. Teach yourself only in a controlled environment, ideally under supervision, and never in a place where an error could mean a fall to the ground.
Checks that prevent most accidents
Experienced climbers stress a few habits. Tie stopper knots in the rope ends so you cannot slide off the end. Check that the device is threaded correctly and that the carabiner is locked. Look at your harness buckles and confirm that the anchor is solid before you commit your weight.
A partner check is useful, too. Having a second person watch your setup catches mistakes you can miss when you are tired or distracted. Never rush a rappel, even when the weather is turning or daylight is fading.
Backups and ways to stay in control
Climbers often add a friction hitch below the device, such as an autoblock, which grabs the rope if the brake hand lets go. It adds protection if a rock hits you or you get stuck in a tangle. A rappel can also be belayed from below by a partner, who can pull the rope tight to stop you.
Each backup has its own limits and set of rules. Learn them properly instead of relying on an internet diagram, and practice at a low height until the steps feel natural.
Common mistakes
Frequent errors include rappelling off the end of the rope, using a device with the wrong rope diameter, leaving a carabiner unlocked, and failing to check that the rope reaches the next ledge. Dropped devices and tangled ropes cause trouble too, because they can leave you stuck on the face.
Another classic problem is hair, clothing or a loose strap caught in the device. Tie back long hair, tuck in loose items and slow down if anything jams. Stop and fix the issue rather than force it.
If you do get stuck, stay calm, stop moving and use your backup before trying to fix the problem. Call for help if you cannot solve it, because a rushed fix on a rope can make a small trouble much worse.
How to learn it properly
Take a course from a certified instructor or guide, ideally one focused on anchors and descents. Many climbing gyms and guide services offer skills clinics that cover rappelling, and local clubs may run mentoring programs. Practice with an experienced partner before you try it on your own.
Keep your gear in good condition, replace worn ropes and slings according to the manufacturer's guidance, and bring a helmet. A careful, unhurried approach is the best protection on any descent.
When to skip the rappel
Sometimes the safest choice is to avoid rappelling altogether. If a walk off exists, if the anchors look worn or questionable, or if you are tired, short of daylight or caught in worsening weather, a different descent may be wiser. Many climbers also lower from fixed anchors at sport routes instead of rappelling, since it keeps the rope threaded.
Ask local climbers or a guidebook about the usual descent for an area. Conditions change, and the standard way down at one crag may not suit another. If you are not sure that the setup is safe, treat that doubt as a good reason to stop and get advice.
Popular right now
- The Best Climbing Nuts and StoppersBuying guide
- Best Belay DevicesBuying guide
- Best Headlamps for ClimbersBuying guide
- Bouldering vs Rope ClimbingArticle
- Climbing Photography BasicsArticle
- The Best Climbing SalvesBuying guide
Based on the last 28 days of search and visitor data.