What Is a Carabiner? Climbing Types, Parts and What They Do
Published How we research
A carabiner is a metal loop with a spring loaded gate that lets you connect pieces of climbing equipment quickly and release them just as fast. It looks simple, but it sits at critical points in a climbing system, from your belay device to the quickdraws on a route. Not every clip sold under that name is made for climbing, and the differences matter. This guide explains the parts, the main shapes and gate types, how to read the markings and how to handle them with care.
Products from this article
The highest-scoring picks from the buying guides this article links to. Scores are our editorial assessment, not customer ratings.
As an Amazon Associate we earn from qualifying purchases. This does not change our picks. Affiliate disclosure
New to Prime? Try Prime free for fast, free shipping on eligible items.
+ Pear shape gives room for a Munter hitch or GRIGRI loading
From our guide: The Best Locking Carabiners
+ 6-pack covers short sport routes or alpine protection
From our guide: The Best Quickdraws
+ Guide mode lets you belay a follower directly off the anchor
From our guide: Best Belay Devices
+ Large pear shape holds multiple ropes and a Munter hitch easily
From our guide: The Best Locking Carabiners
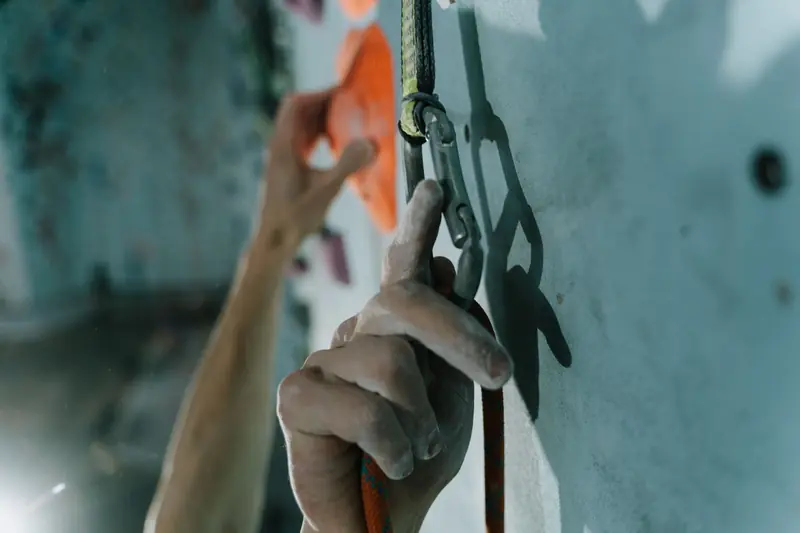
What a carabiner is for
In climbing, carabiners link the rope to protection, connect a belay device to your harness and attach slings to anchors. The gate opens inward to let a rope or sling slip in, then springs shut. A good one opens smoothly with one hand and closes with a clear snap.
Climbing carabiners are designed to take loads along their long axis, which is the direction they would be pulled in a fall. Using them in other ways can sharply cut how much they can hold, which is why the way a carabiner is loaded matters as much as which one you choose.
Parts you should know
The spine is the long, solid side opposite the gate and carries most of the load. The gate is the moving side, hinged at one end. Its free end is the nose, which closes against the tip of the spine. On a hook nose design the spine tip has a small hook that the gate catches, while on a keylock (keyhole) design the nose sits in a notch with no hook, so it is less likely to snag on rope or gear. The basket is the curved inside area, and the hinge is where the gate pivots.
Knowing these names helps when you read a manufacturer manual or talk with a coach. For instance, many manuals warn about rope or sling loading across the gate, which weakens the carabiner, and about gate lock failures from dirt or sand in the hinge.
Locking and non-locking models
Non-locking carabiners are used mostly on quickdraws. One carabiner of the quickdraw goes on the bolt or other fixed point and the other takes the rope, and a non-locking gate lets you clip quickly. Locking carabiners have a sleeve or auto-locking gate that stops the gate from opening unintentionally, so they are used for belaying, anchors and anything that must not come loose.
Screw gate models need you to twist a sleeve closed by hand. Auto-locking models close and lock on their own, often with a twist or slide to open them. Many climbers prefer auto-locking ones for belaying because there is less to forget, though a screw gate remains common and works well when checked every time.
Shapes and gate styles
Common shapes include the oval, the D, the asymmetrical D and the pear or HMS shape. D shapes tend to push the load toward the spine. Pear shaped models are wide at one end, which suits belay devices and friction hitches, as in a Munter hitch.
Gates can be straight, bent or wire. A bent gate makes it easier to clip a rope into the carabiner, which is why it is often placed on the rope end of a quickdraw. A wire gate is lighter and less prone to vibration when the rope runs across it. Gate styles vary by brand, so check the product page.
Reading the markings
Real climbing carabiners are stamped with strength ratings in kilonewtons, typically for the major axis with the gate closed, the major axis with the gate open and the minor axis. Look for a CE or UIAA certification mark as well. According to manufacturers, these numbers come from lab tests under set conditions rather than real world falls.
If a carabiner has no markings, treat it as unsuitable for climbing. Key ring clips and hardware store gear are not designed or tested for life safety use, even when they look similar. Always read the manual that comes with the product.
Inspection and care
Before each climb, check that the gate opens and closes fully, that the lock engages and that there are no sharp burrs or deep grooves. Wipe off dirt, and avoid dropping a carabiner on hard ground, because a hard drop may cause hidden damage that you cannot see. Many manufacturers advise retiring a carabiner that has fallen a long way onto a hard surface.
Keep carabiners away from chemicals such as acids and strong cleaners. A drop of dry lubricant on the hinge is a common routine for a sticky gate, but follow the guidance on your carabiner's instructions. When in doubt, replace it, since a new one costs much less than an accident.
Common mistakes to avoid
A frequent mistake is cross loading, which means the carabiner is pulled across its minor axis or against its gate instead of along the spine. It can happen when a carabiner is wedged in a tight spot or twisted by a sling. Give each one room to align with the load, and check before you trust it.
Another habit to watch is leaving a locking gate unlocked after you clip in. Make it a routine to check the lock on every carabiner that matters, and do a partner check before every climb. A second pair of eyes is good practice for every climber, not only beginners. Simple habits like this prevent most avoidable problems, and instructors will happily teach them.
Choosing the right one
Start from the job: belaying, anchoring, a quickdraw or an everyday gear clip. Match the shape and locking type to that job and look at the weight and the size of the gate opening, which should handle your rope or webbing easily. Accessory carabiners marked "not for climbing" are made for carrying gear, such as clipping a water bottle to a pack, and must never be loaded as life-safety equipment. Climbing carabiners carry strength markings, and only those should hold your weight or a fall.
Buy from a reputable climbing retailer and keep your carabiners in a dry place. If you are new, ask an instructor to show you how they use each type, since seeing them in action makes the differences much clearer.
Popular right now
- The Best Climbing Nuts and StoppersBuying guide
- Best Belay DevicesBuying guide
- Best Headlamps for ClimbersBuying guide
- Bouldering vs Rope ClimbingArticle
- Climbing Photography BasicsArticle
- The Best Climbing SalvesBuying guide
Based on the last 28 days of search and visitor data.